A good photo is not only about beauty. Sometimes, it is about accuracy, clarity, and meeting official requirements. Whether you are applying for a passport, visa, student ID, driver’s license, or another official document, your ID photo must look clean, balanced, and professional.
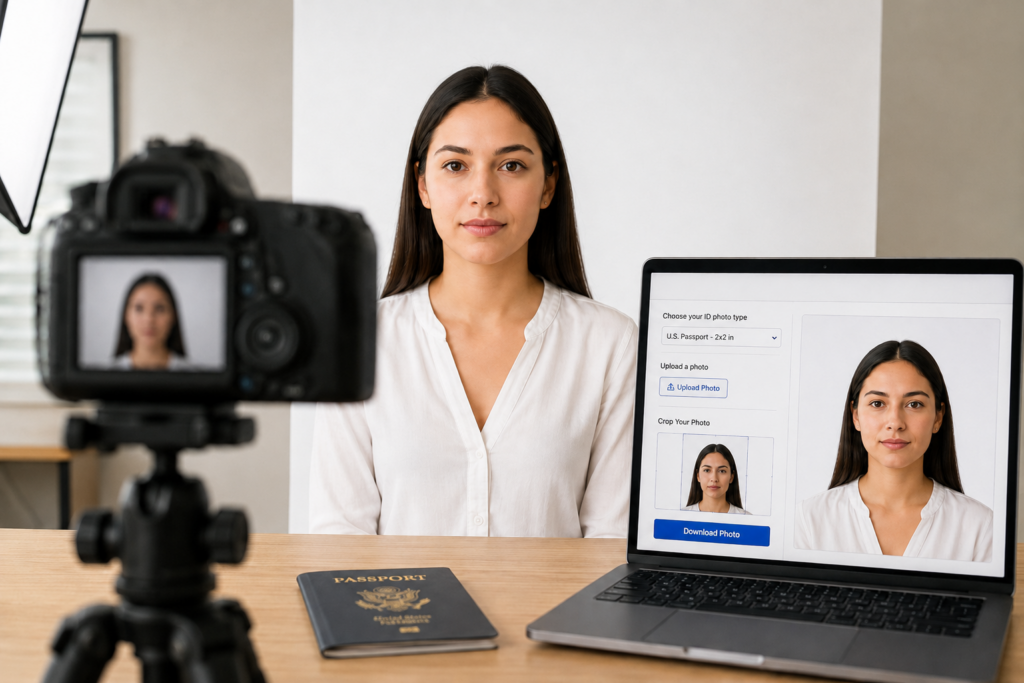
The good news is that you no longer need to visit a photo studio every time you need a passport or visa photo. With the right lighting, background, pose, and online tools such as IDPhotoDIY.com, you can create a proper ID photo from home.
Why ID Photos Require Careful Photography
Unlike creative portraits or lifestyle photography, ID photos follow strict rules. The face must be clearly visible, the lighting should be even, and the background should usually be plain and free from shadows. Small mistakes, such as tilted posture, covered eyes, poor lighting, or the wrong crop size, can cause problems when submitting the photo.
That is why taking an ID photo at home should still be treated like a small photography project. A simple setup can make a big difference.
Start with Good Lighting
Lighting is one of the most important parts of any photograph. For an ID photo, avoid dramatic shadows, colored lights, or strong side lighting. Natural daylight from a window often works well, especially when it falls evenly on the face.
Stand facing the light source instead of placing the light behind you. This helps reduce shadows on the face and background. If the room is too dark, use an additional lamp, but make sure the light is soft and balanced.
Choose a Plain Background
Most passport and visa photos require a plain background, often white or light-colored. A clean wall is usually enough. Make sure there are no decorations, furniture, frames, or shadows behind you.
If your background is not perfect, online tools can help. IDPhotoDIY.com allows users to upload a photo, crop it to the correct size, and prepare it for printing or digital use.
Dress Properly for the Photo
Your clothing should contrast with the background. If the background is white, avoid wearing a white shirt because your shoulders may blend into the background. Choose normal everyday clothing instead of uniforms or overly decorative outfits.
Avoid sunglasses, tinted glasses, hats, or anything that hides the face unless it is worn for religious reasons and allowed by the official photo rules.
Keep Your Pose Simple
For an official ID photo, look directly at the camera. Keep your head straight and your shoulders visible. Do not tilt your face or turn sideways. Your expression should usually be neutral, with eyes open and mouth closed.
Ask someone else to take the photo instead of using a selfie. A rear smartphone camera or digital camera usually gives better quality than a front-facing selfie camera.
Crop the Photo Correctly
Even if the original photo looks good, the final crop must match the required document size. Different countries and documents may have different photo dimensions. For example, passport, visa, and ID card photos may all require different sizes.
Print or Submit the Final Image
Once your ID photo is ready, you can print it at home, save it to a USB drive for printing at a local photo shop, or use it digitally if your application accepts online photo uploads.
This can save both time and money compared with visiting a traditional studio. It is especially convenient for families, students, travelers, and anyone who needs document photos regularly.
Final Thoughts
Taking an ID photo at home is simple when you understand the basics of photography: clean lighting, plain background, correct posture, and accurate cropping. While artistic photography allows freedom and creativity, official ID photography requires precision.
With a careful setup and a tool like IDPhotoDIY.com, you can create passport, visa, and ID photos from home while still achieving a clean and professional result.